Pre-Installation – GSCA
Pre-Installation
FOLLOWING STEP BY STEP FOR SPECIFIC PRACTICE. YOU WILL KNOW THE DETAIL OPTIONS THROUGH THE PRACTICES.
01 OVERVIEW >02 KEY USP > 03 PREINSTALLATION > 04 CABINET INSTALLATION > 05 CABLING > 06 LDM ATTACHMENT > 07 SYSTEM CONTROLLER > 08 EVALUATION > 09 CERTIFIED PARTNER
Inspection
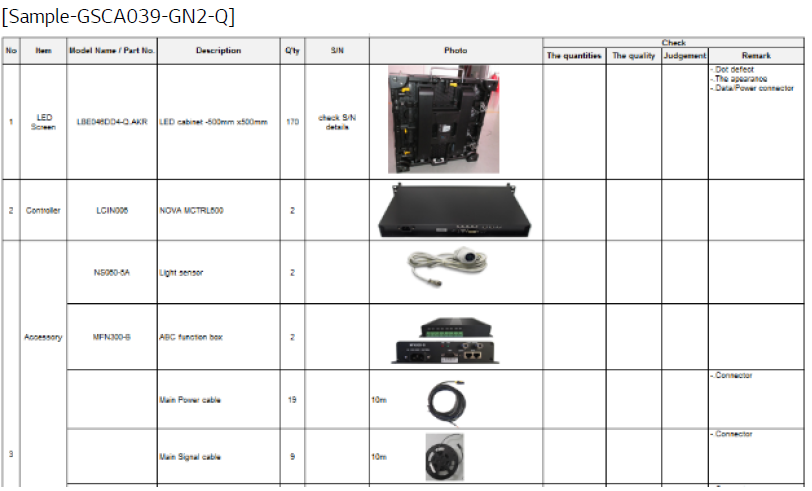
1. Packing List
Check the supplied items against the packing list.
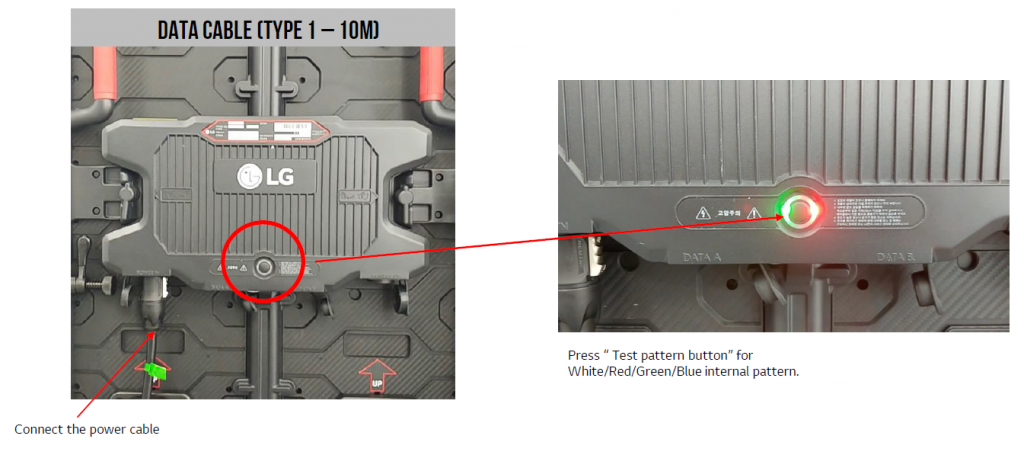
2. Cabinet test.
Visually inspect the cabinet for shipping damage.
Power up cabinets and operate the self test function, check for pixel defects on white, red, green, blue patterns

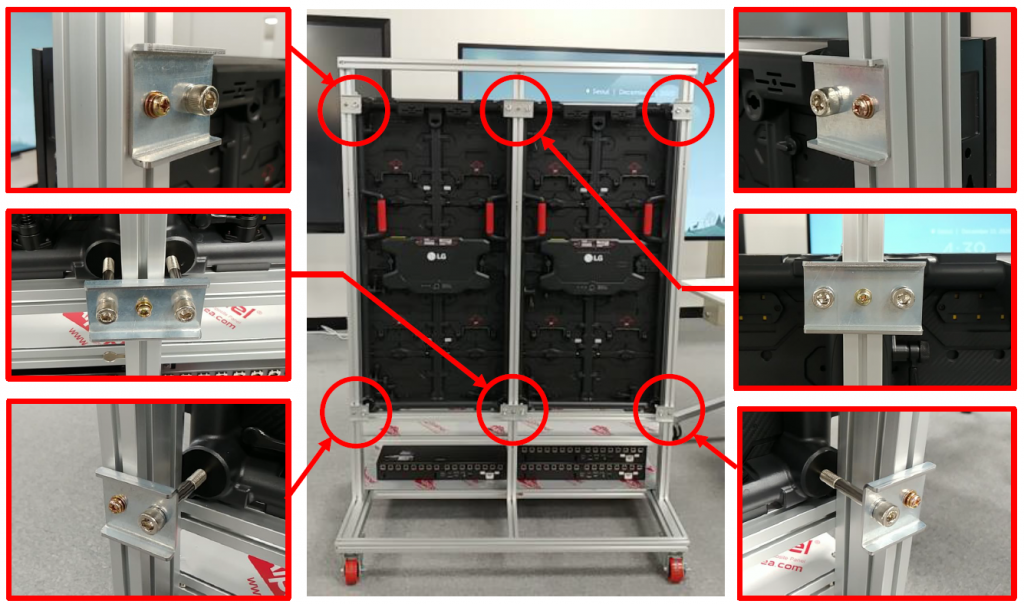
GSCA Training Kit – LG Sample
The sample mounting kit are aligned using horizontal and vertical mounting bars. Fit the cabinets to mounting bars and position the structure on the kit with the right srews.