Installation – Magnit
Installation
FOLLOWING STEP BY STEP FOR SPECIFIC PRACTICE. YOU WILL KNOW THE DETAIL OPTIONS THROUGH THE PRACTICES.
01 KEY USP > 02 COMPONENT > 03 CONFIGURATION > 04 INSTALLATION > 05 SOFTWARE CONFIGURATION > 06 EVALUATION > 07 CERTIFIED PARTNER
Installation on profile stand with wall mounts
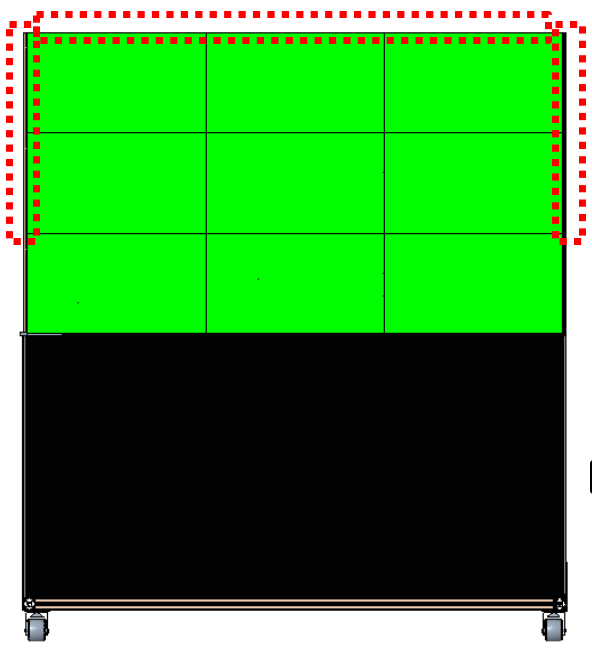
The following installation is intended for a Full HD (3×3) arrangement:
1.1 Check packaging content
Before beginning the installation, please make sure the following packaging content is delivered:
-Profile stand with wall mount
-Main cabinet units 3EA
-Secondary cabinet units 6EA
-LED Controller 1EA
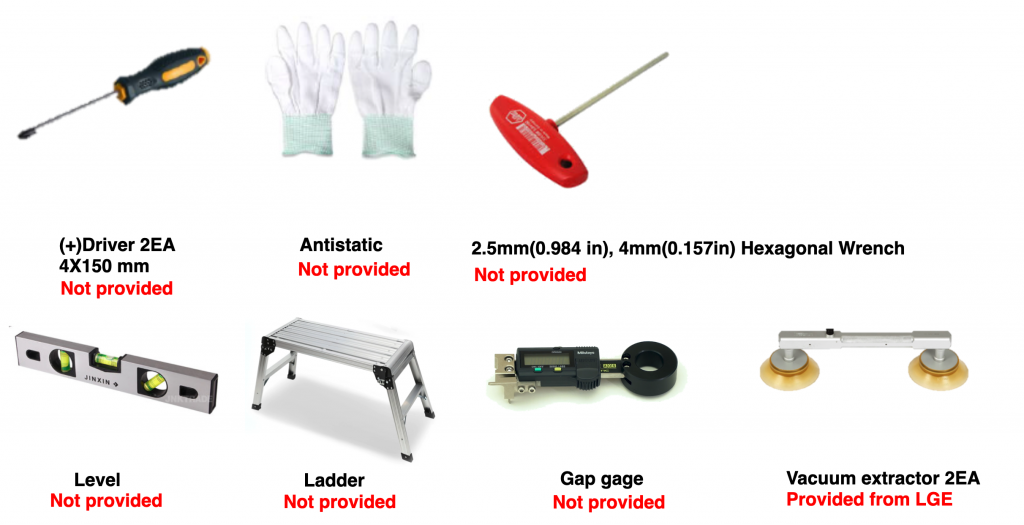
1.2 Preparing the tools
Before beginning the installation, please make sure the following material is prepared:
2.1 General overview
In this section, a general overview of the process will be provided, every step will be detailed further in this guide.
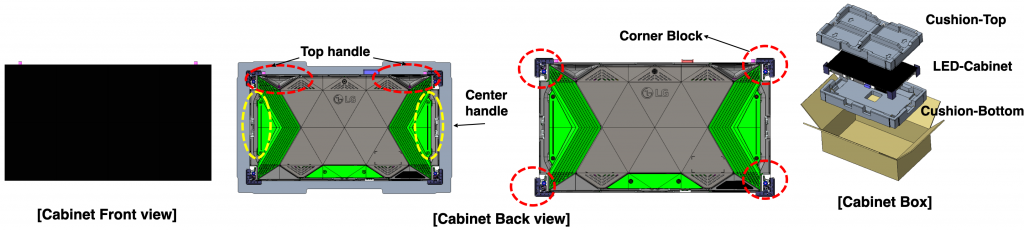
2.2 Part details
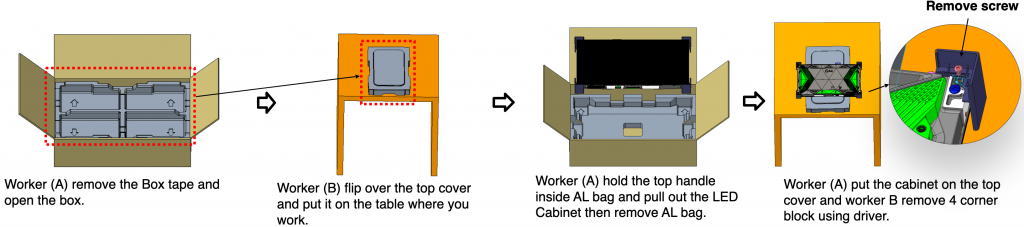
Detailed information on unpacking the cabinets from their boxes
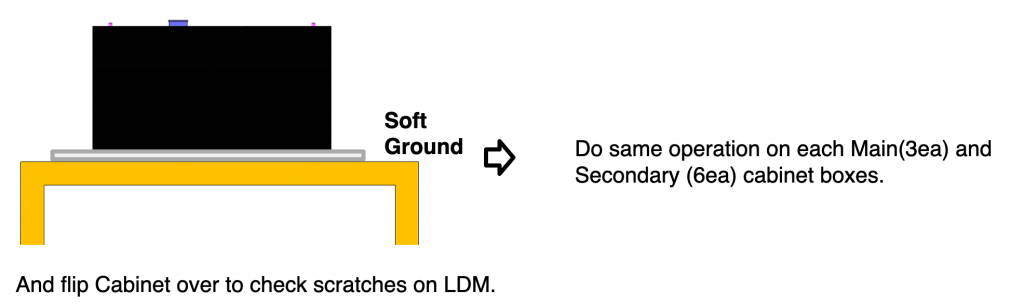
2.3 How to handle the cabinets
In order to avoid any damages to the cabinets, we recommend the following workflow
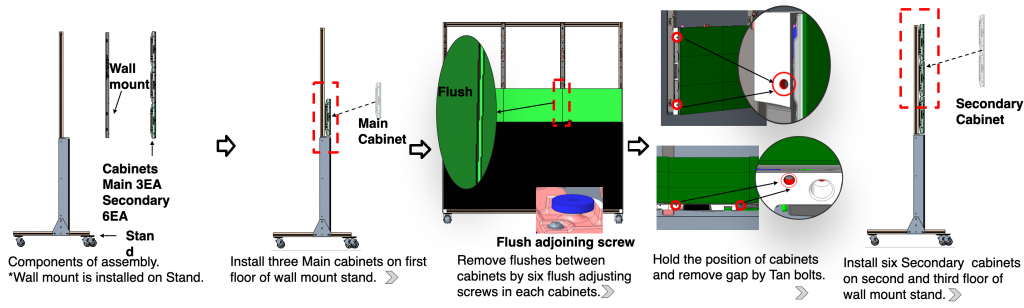
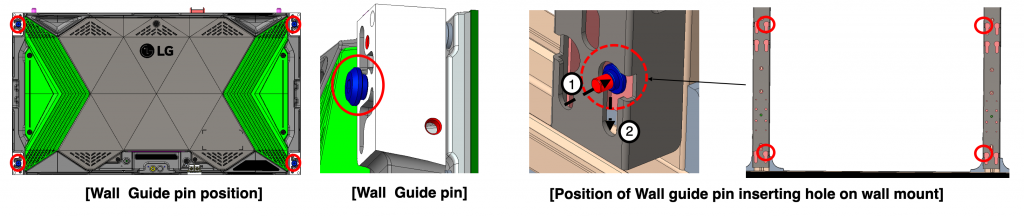
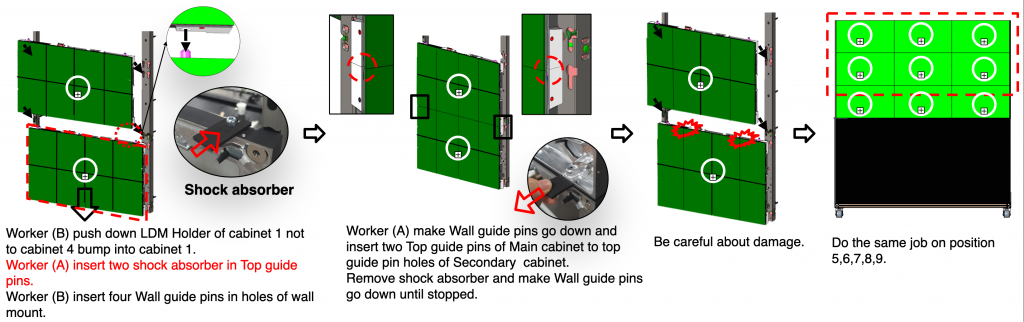
2.4 Installing the main cabinets on the wall mount stand

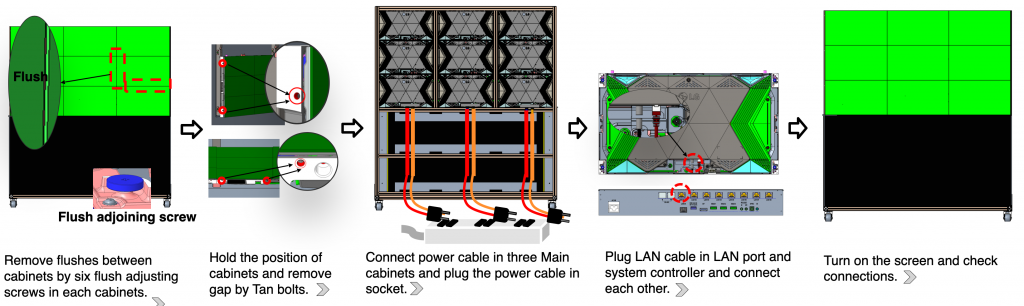
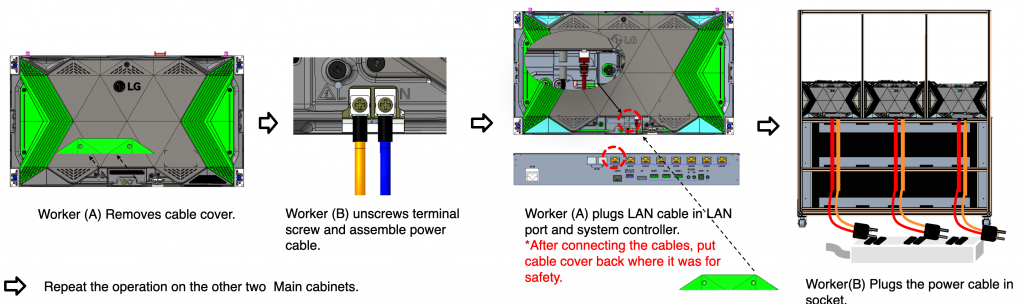
3.1 Power connection
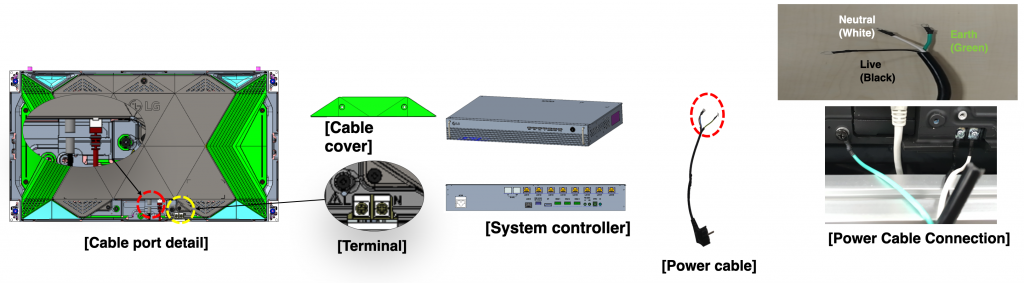
3.2 Power cable assembly
4.1 Secondary cabinets details
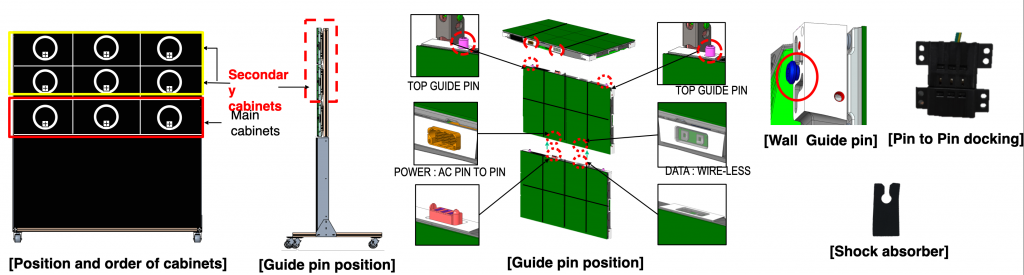
4.2 Installing the secondary cabinets
5.1 Cabinet disassembly details
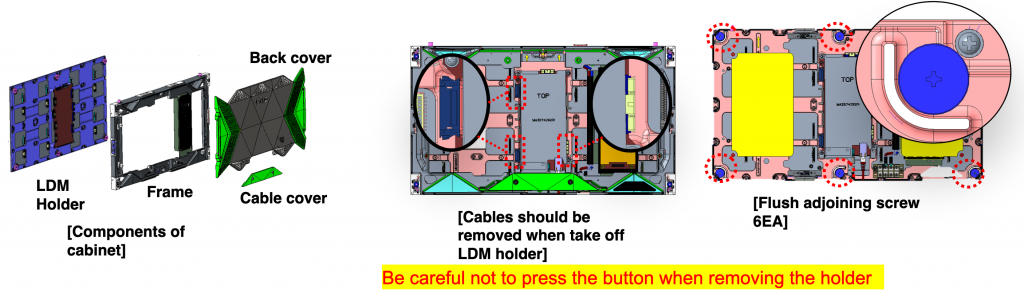
5.2 Removing the flushes between cabinets

6.1 Fine tuning bolts details
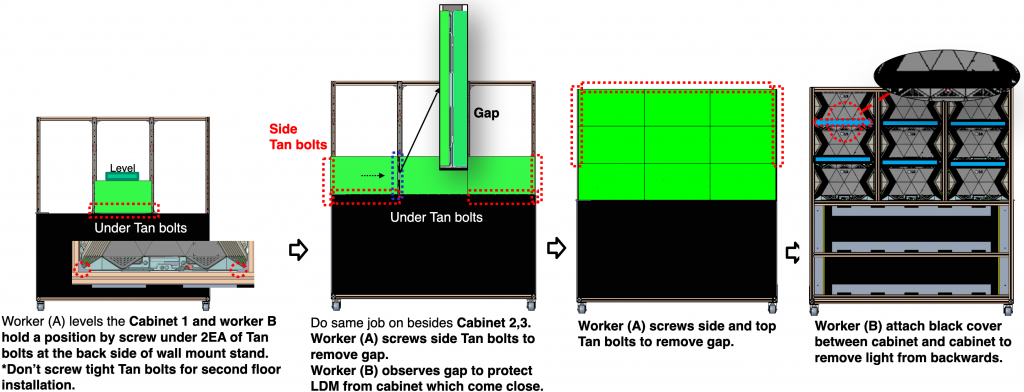
After removing the flushes between cabinets, fine tuning using the tan bolts is required to remove the gaps.
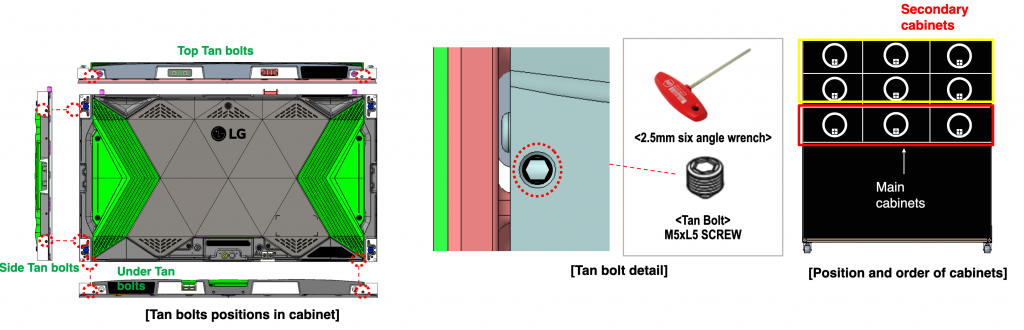
6.2 Removing the gaps