Overview – GSCD
Overview
FOLLOWING STEP BY STEP FOR SPECIFIC PRACTICE. YOU WILL KNOW THE DETAIL OPTIONS THROUGH THE PRACTICES.
01 OVERVIEW >02 KEY USP > 03 PREINSTALLATION > 04 CABINET INSTALLATION > 05 CABLING > 06 SYSTEM CONTROLLER > 07 EVALUATION > 08 CERTIFIED PARTNER
Why GSCD
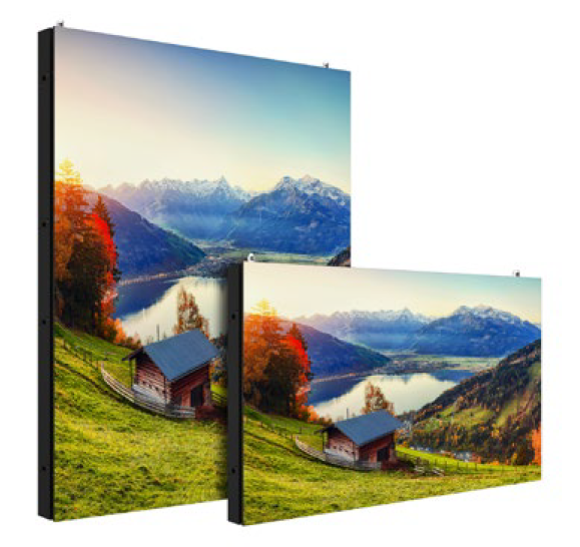
Ultra Light Outdoor LED
1. Fast Assembly and Easy Maintenance
2. Easy Installation – Wall to wall Installation
3. Two Cabinet Options (1000×1000, 500×1000)
4. 90° Corner Available (Option)
5 .IP65 Weatherproof Design
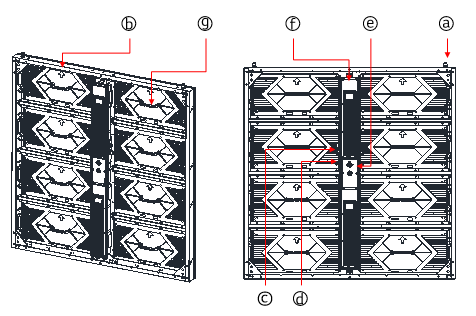
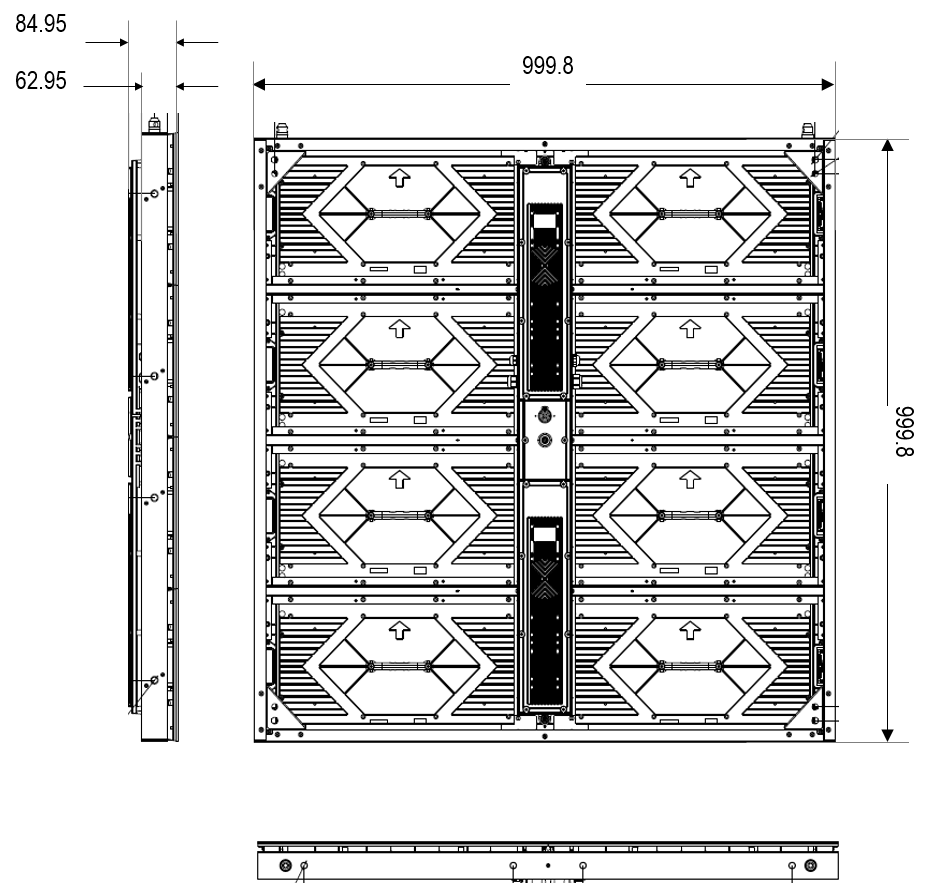
Cabinet Overview – (1000×1000)
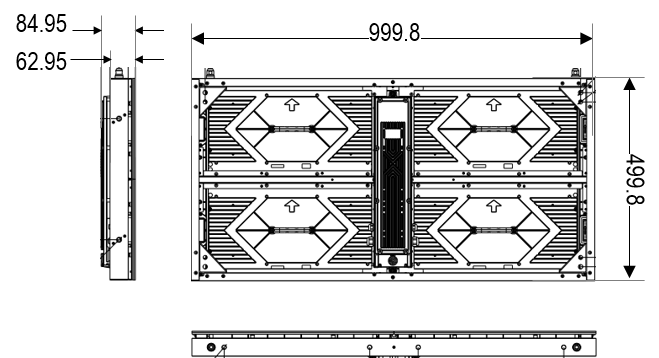
Cabinet Overview – (500×1000)

| Pos | Name | Note |
|---|---|---|
| a | Position Pin | Convenient for assembly |
| b | Up arrow | To help identify the direction |
| c | Data I/O | Data input and output |
| d | Handle | Holding the LED Module |
| e | Power IN | AC power input |
| f | Test Button | Used for self-test to check the panel’s status |
| g | Control unit | Inner with power supply and receiving card |
| h | Module Handle | Holding the Module |
GSCD100-GN
GSCD100-GN2
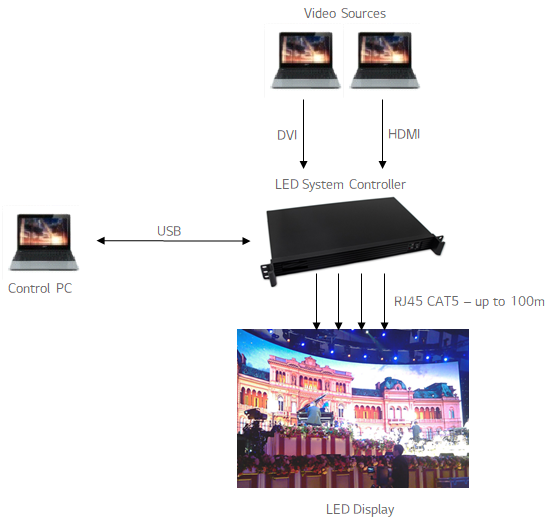
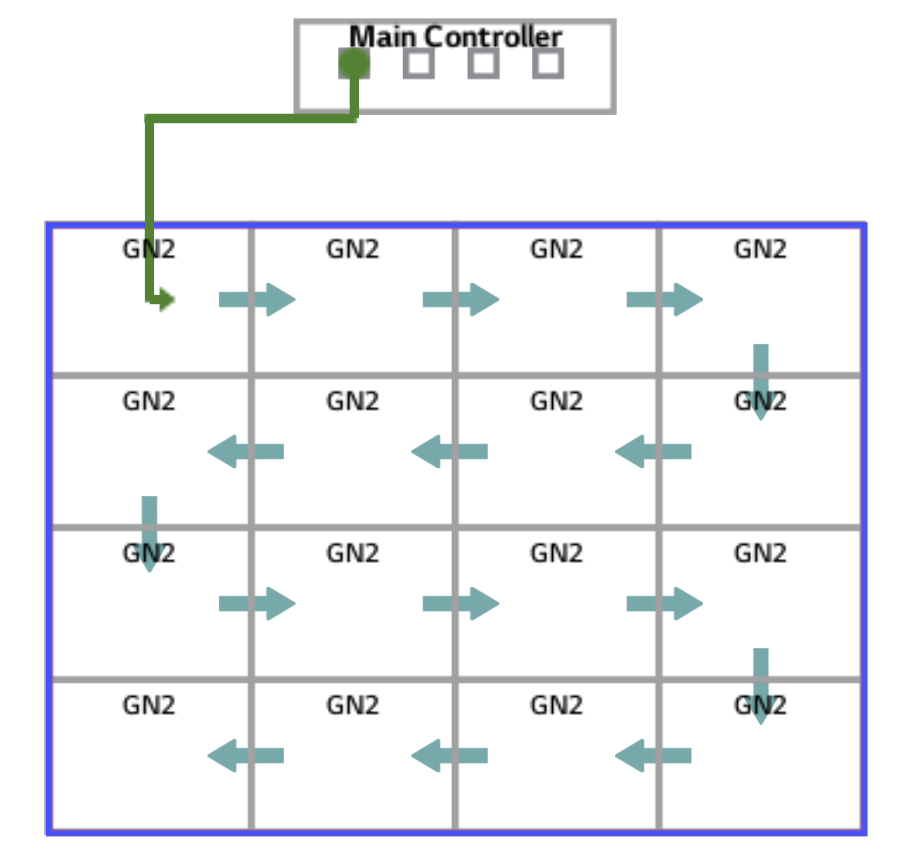
System Controller

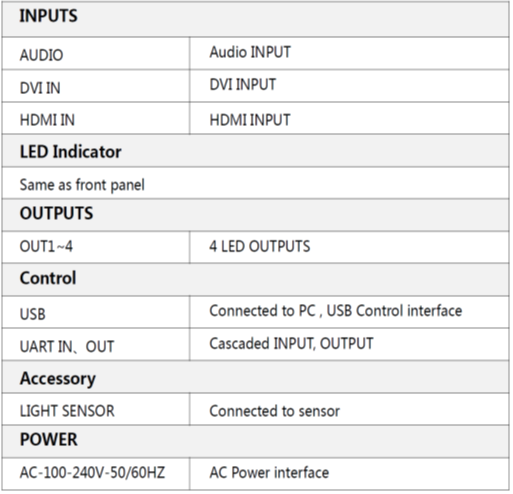
Standard Configuration