SuperSign CMS -Self Practice
Step 03 Self Practice
Following Step by Step for sepcific practice. you will know the detail options through the practices.
01 ONLINE DEMO > 02 CREATING ACCOUNT > 03 SELF PRACTICE > 04 BOOKING A DATE > 05 EVALUATION > 06 CERTIFIED PARTNER
Module 10: Guides
How to practice with Slef-Practice guide
- Initiate self-directed learning. Improve your skills by completing the missions and practicing SuperSign CMS continuously.

Mission 1: Contents
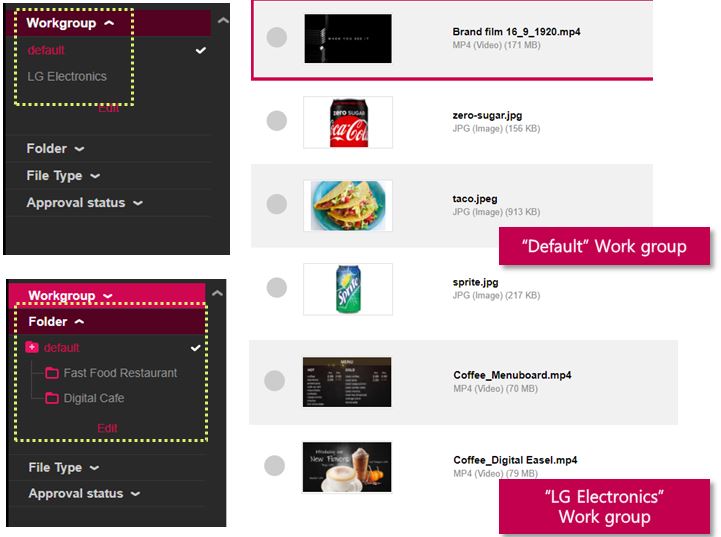
Upload contents at your server and create new content for special purpose
- Move to content tab
- Note: Regardless of the workgroup selection, users can view all contents in all workgroups at default group? ( Yes / No )
- Create a new folder “Fast Food Restaurant” and “Digital Cafe” under the default workgroup
- Upload “any” video contents to the folder “Digital Cafe”
- Upload “any” image contents to the folder “Fast Food Restaurant”
- Successful result should be same with right side images
Mission 2: Distribution
Schedule Distribute contents to your monitor
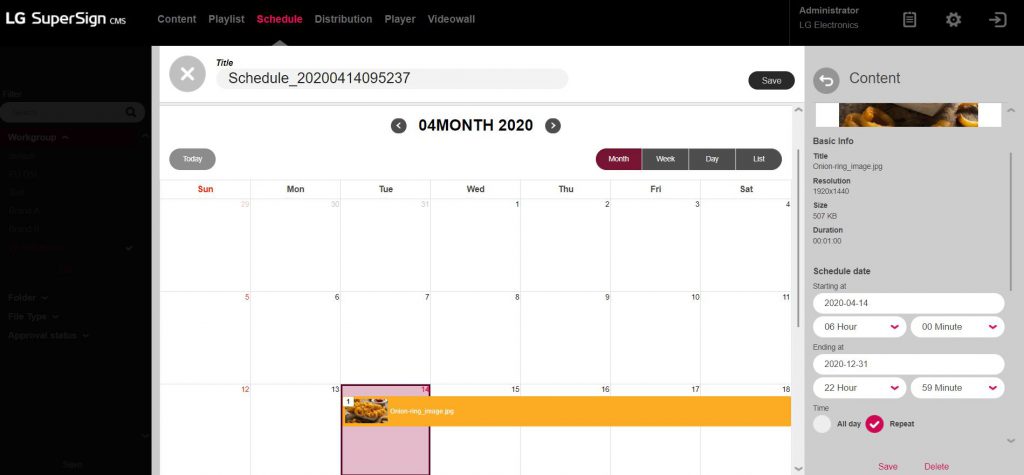
- Move to Schedule tab and create and save new distribution task
- Set the time schedule and content as belowStarting Time : 6:00 AM
- Ending Time : 10:00 PM
- Repeat : Monthly until end of this year
- Content : Any Video content


Mission 3: New user registration
Register a new user for multiple managers
- Get into setting menu by the icon at right-top side
- Move to ‘Role’ menu
- Create new role as “News distributor”
- Enable the authority as below and apply
- Move to ‘User’ menu
- Create new account with belowRole : News distributor
- Workgroup : News title
- Login again with created account
Mission 4: Log report
- Move to player tab and enter the monitor
- Get into Log report to see the history of recent logs by
- clicking more button
- Set the period to last 3 days
- Set the index as “Playback” and check
- the number of playback and start/end time
- Export log report as an excel file


Mission 5: E-mail alarm
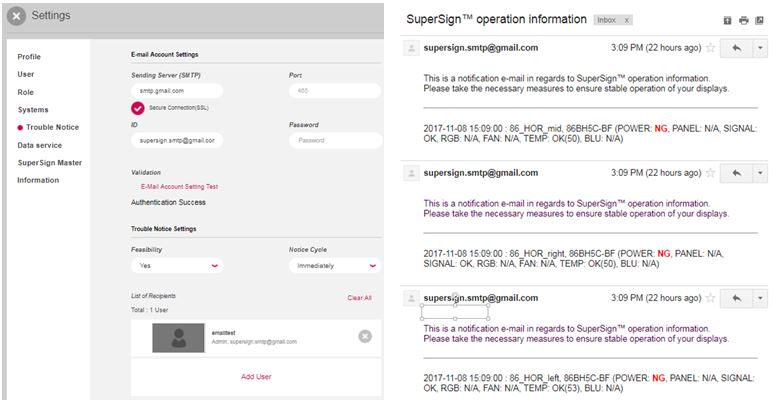
Set the e-mail alarm service for remote management
- Move to setting menu and “Trouble Notice
- Fill in SMTP e-mail account setting option
- Assign SuperSign CMS user account to list of recipient
- Open that Gmail inbox and check the e-mail from SuperSign CMS
Mission 6: Player Control
Controlling and Managing registered player

- Move to player tab
- Assign a tag “Normal” on your registered monitor
- Get into ‘control’ menu and select the control item to ‘time’
- Set the time of monitor to time of PC
You have completed the step 03. Let’s move to step 04.
