Pro:Centric Direct -Self Practice
Step 03 Self Practice
Following Step by Step for sepcific practice. you will know the detail options through the practices.
01 ONLINE DEMO > 02 CREATING ACCOUNT > 03 SELF PRACTICE > 04 BOOKING A DATE > 05 EVALUATION > 06 CERTIFIED PARTNER

Mission 1: Contents
Upload contents at your server and create new content for special purpose
- Move to the Project tab
- Under Library, create a new folder with your company name, this will be referred to as your “main” folder
- Inside your main folder folder, create a new sub-folder called “logos” upload any logos or pictures that you would like to use for hotel identity
- Inside your main folder,create a sub-folder called “Background” upload pictures you would like to use as background for every page.
- NOTE: Pictures up to FullHD resolution are supported.
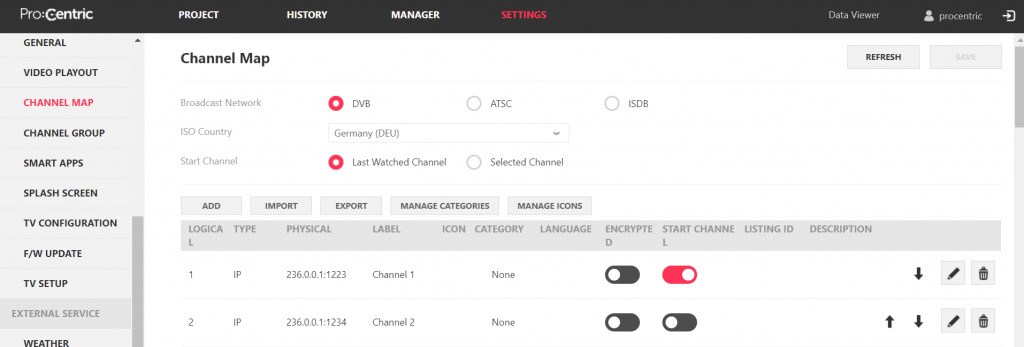
Mission 2: Channel Map creation
Schedule Distribute contents to your monitor
- Move to the “SETTINGS” tab and then to “CHANNEL MAP”
- Create 2 channels adding any information freely, you can choose the type (RF/IP) by yourself
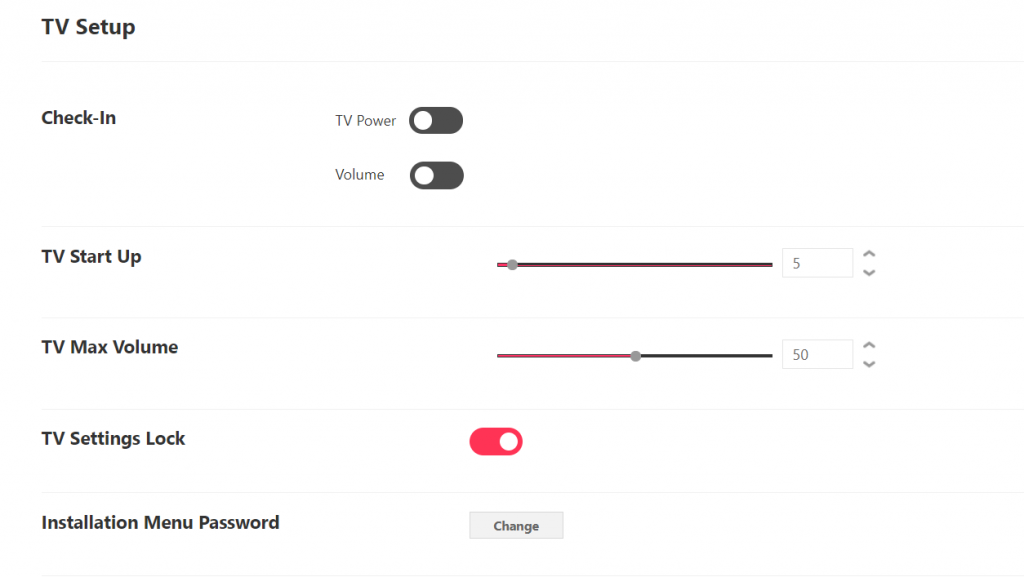
Mission 3-1: TV settings setup – New User
Register a new user for multiple managers
- Go to the SETTINGS tab
- Under the “TV” sub-menu, go to “TV SETUP”
- Set Start Up volume to “5”
- Set Max Volume to 50
- Enable “TV Settings Lock”
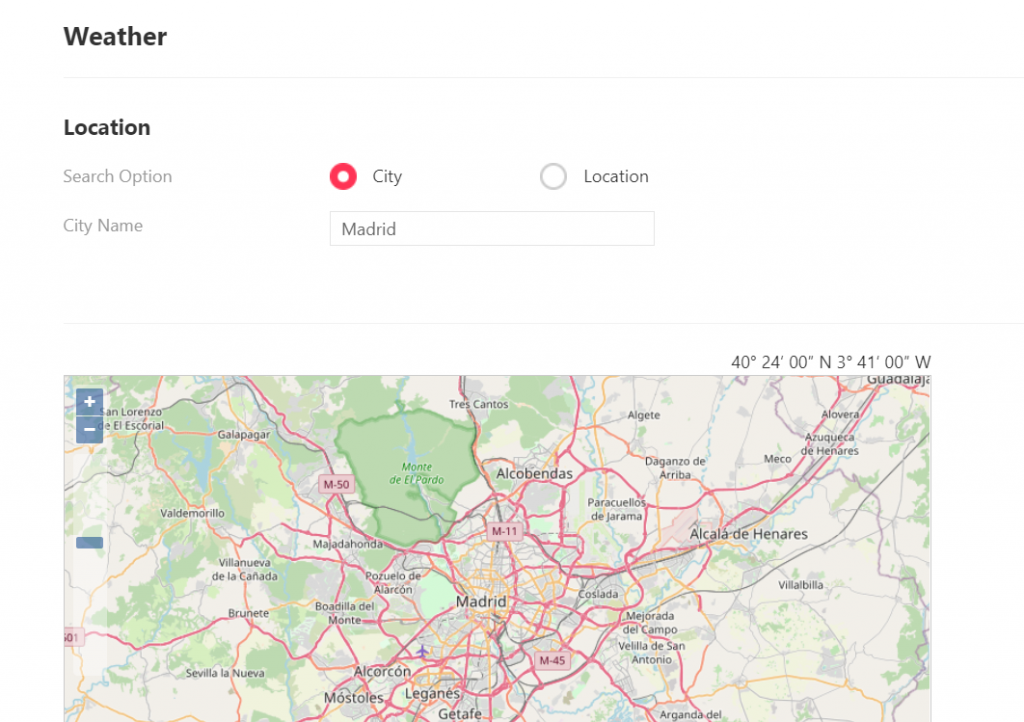
Mission 3-2: TV settings setup – Weather
configure Weather Settings
- Under the “EXTERNAL SERVICE” sub-menu, go to “WEATHER”
- Set the city to “Madrid”
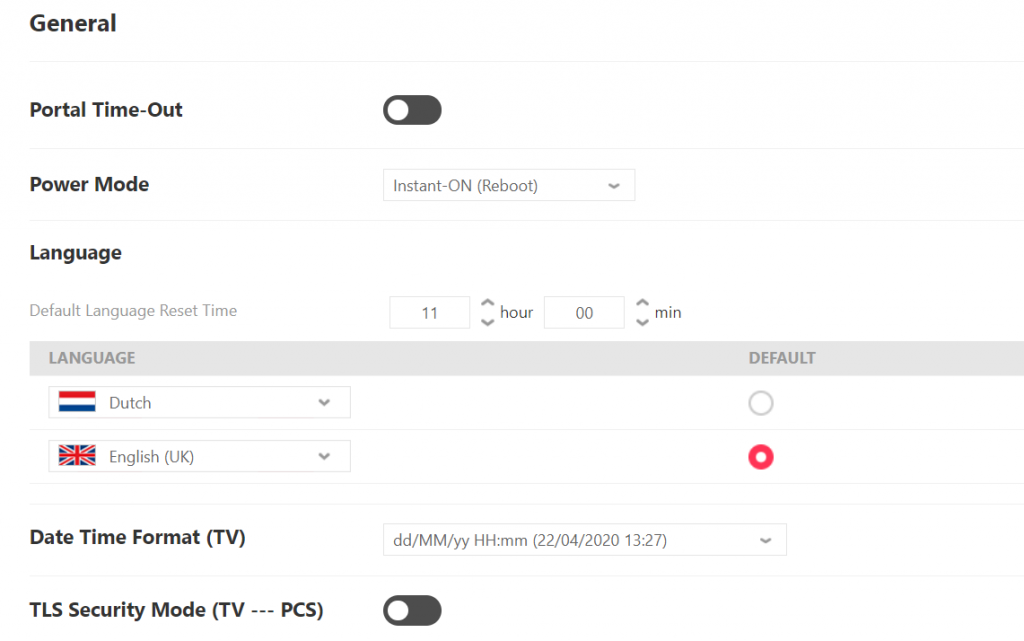
Mission 3-3: TV settings setup – General
General Settings configuration
- Go to the SETTINGS tab
- Under the “TV” sub-menu, go to “GENERAL”
- Set Power Mode to ‘Instant-on (Reboot)”
- Set main language to English UK and add a second language of your choice
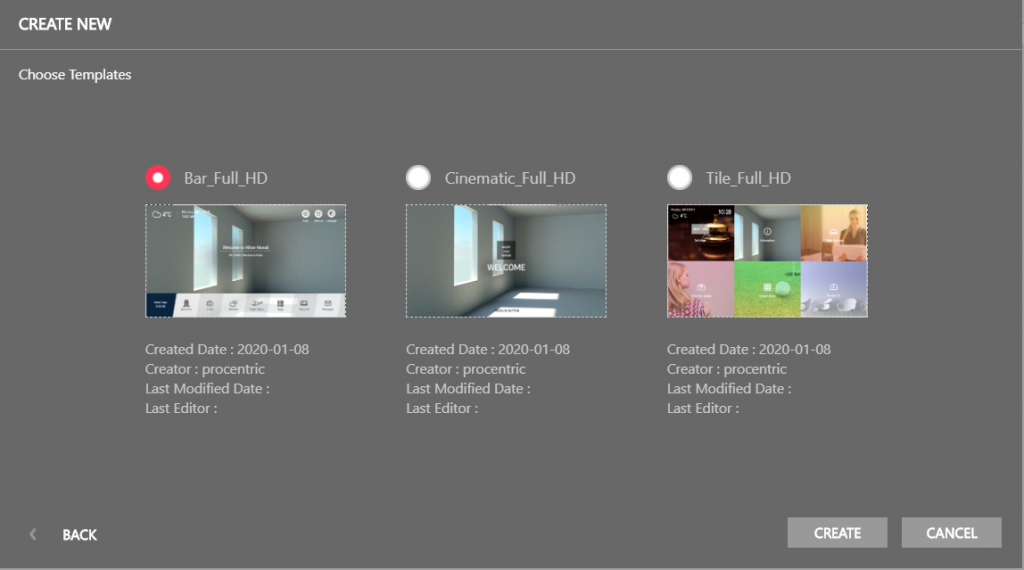
Mission 4: Project Editor
- Go to the “PROJECT” tab
- Create a new project, you may choose any of the provided templates
- Time to get creative! Get comfortable with the canvas and widgets
- Make sure to use the following widgets: Weather, PIP, Soft AP, Room Number, QR Code
- Customize the interface using your uploaded pictures

Mission 5: Deploy your project
Set the e-mail alarm service for remote management
- Within the Project Editor, save your project
- Once you have saved, you may deploy it to the deployment groups as required.
You have completed the step 03. Let’s move to step 04.
Please use the form to the left to request access to the demo server
We will process your request and send you the login information as soon as possible
Or send us an Email:
eudsl@lge.de