Cabinet Attachment – GSCA
Cabinet Attachment
FOLLOWING STEP BY STEP FOR SPECIFIC PRACTICE. YOU WILL KNOW THE DETAIL OPTIONS THROUGH THE PRACTICES.
01 OVERVIEW >02 KEY USP > 03 PREINSTALLATION > 04 CABINET INSTALLATION > 05 CABLING > 06 LCabinet ATTACHMENT > 07 SYSTEM CONTROLLER > 08 EVALUATION > 09 CERTIFIED PARTNER
Cabinet Attachment
Installing frame for cabinet mounting with M10 x 75L Screws and fasten locker.
– Check each vertical / horizontal structure with gradient; make sure all structures are straight and at a same level.
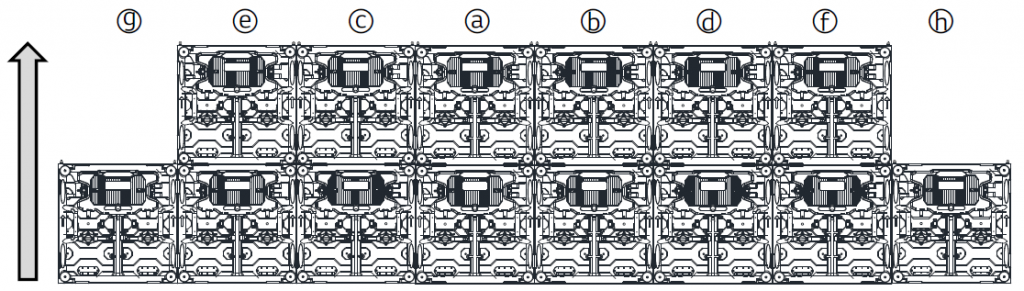
– Put 2 cabinets on the middle and tight them together with side locks then tighten them on the structure with the brackets,
see below picture.

From the middle spread to outside to finish the bottom row, see below:

Follow above to finish install from bottom to up, see below:
Cleaning Guide
Do not use abrasive, caustic or solvent-based products for cleaning, as they can cause surface damage.
To clean a GSCA series panel:
- Vacuum or gently blow away dust and loose particles from the panel with low-pressure compressed air.
- Wipe the outside of the LED modules with a soft, lint-free
- Apply gentle pressure only.
Front or Rear Serviceability
The product offers either front access or rear access, allowing customers to choose installation options according to their environment and minimizes limitations in installation and maintenance
